Showing posts with label ornaments. Show all posts

Sunday, December 17, 2023

Merry and Bright Ornaments

 Good Morning, Stampers!

I'm so grateful and blessed for my little Stampin' Up! team!
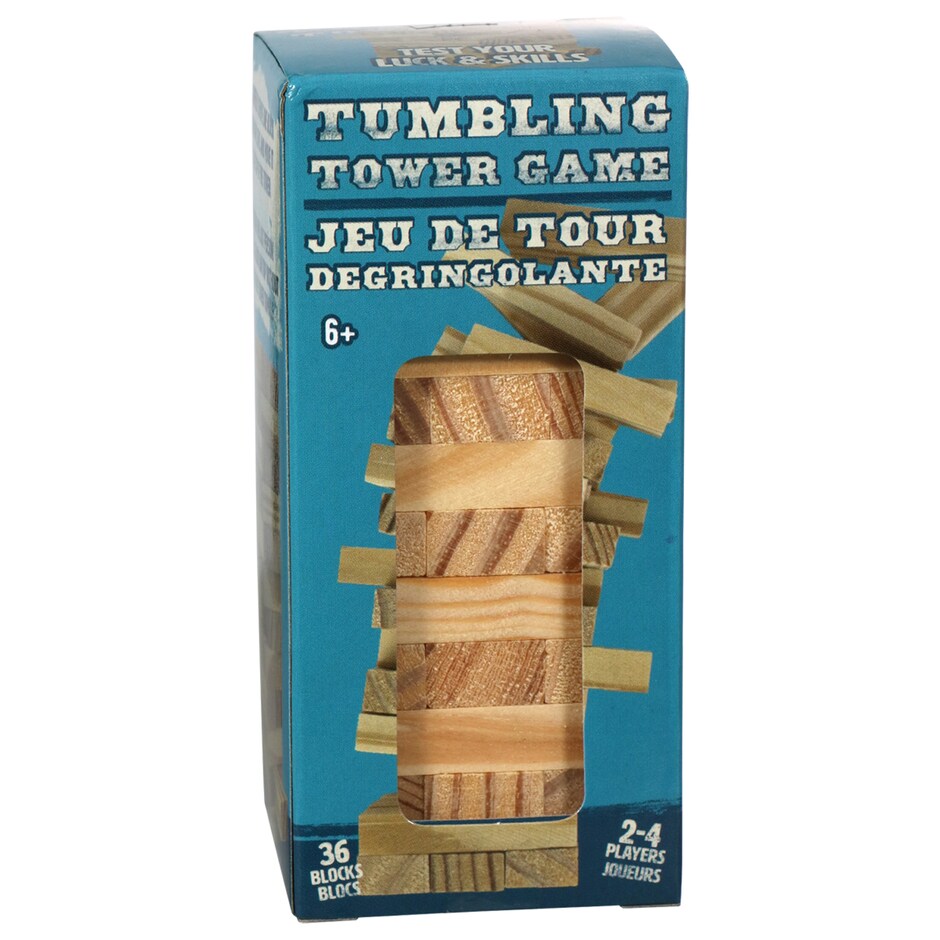
I created these holiday ornaments using the Tumbling Tower 
Blocks from Dollar Tree and the Brightest Glow stamp set. 
I love how they turned out - I hope my team loves them, too!


SU!pplies:
Stamps: Brightest Glow
Ink: Tuxedo Black
Paper: Basic White, Basic Black
Accessories: Christmas Classics dies, Black/White gingham ribbon
Misc.: Tumbling Tower Blocks , Greenery, Berries (Dollar Tree), Black Chalk Paint , Eye Hooks (Hobby Lobby)


Happie Stampin'!
~Melissa

Check out more ideas featuring
Dollar Tree products!


Friday, December 08, 2023

rubberFUNatics Weekly Challenge #269

 Good Morning, Stampers!

(click photo to enlarge)

This week's rubberFUNatics Weekly Challenge is to
create a home decor piece. This medallion is an "oldie
but goodie" and can be used as a package topper, ornament
or door hanger. They are quick and easy and a great way
to use up your thin scraps of designer papers. Get the
kids involved - a great project for all ages!


A colorful Christmas ornament...


or door hanger!


Cut (7-10) 1/2" x 12" strips of designer paper.
Fold in half.


Cut (7-10) 1/2" x 3 1/2" coordinating cardstock.
You can leave as is, emboss it or stamp on it.
Cut the end in a "v" to form a banner.


Fold down each side of the designer paper strip- do not crease.


Slide the cardstock down the middle - flush
at the bottom. Staple to secure.


Arrange the pieces in a circle.


Adhere both sides with a circle to hold.
Add a sentiment or stamped image on top.


Cut a piece of linen thread or ribbon.
Fold in half and tie in a knot at the top.
Tuck and adhere the ribbon between two loops to secure.

Adjust the measurements to make these in different sizes, too!


I hope you give this one a try and fill your tree and gifts with these in a variety of colors!

Happie Stampin'!
~Melissa 

Tuesday, December 21, 2021

Wood Block Holiday Ornaments

 Good Morning, Stampers!

I had so much fun creating these ornaments for my team members! I have boxes and boxes AND BOXES of retired wood-mount stamps and took to the internet in search of something fun I could make with them. I came across this idea and knew right away that this is what I wanted to do! 


Do you recognize any of these "oldies but goodies"??
I drilled a hole down the middle of the wood block and inserted a wire.
 I found serveral different types of festive holiday beads and bells online 
and I got to work! I just love how they came out! 

Wonder what else I can do with my retired stamps! 🤔


Happie Stampin'!
~Melissa


Monday, November 22, 2021

Homemade Rolling Pin Ornaments

 Good Morning, Stampers!


I'm back today with another table gift (party favor) from
our Onstage event last week. I found the 7" rolling pins
unfinished and just painted them and added the letters
with vinyl. For the tag, I freehanded the sheet pan and
die cut the spatula using the Cookin' dies. 


Here are the rolling pins up close. I added a screw eye
at the top to make this an ornament keepsake of our fun event!


SU!pplies:
Paper: Very Vanilla, Heartwarming Hugs
Accessories: Real Red Ruffled ribbon, Playful Pets trim, Evening Evergreen ribbon,
Wintry snowflake embossing folder

Happie Stampin'!
~Melissa


Monday, December 07, 2020

Wooden Domino Ornaments

 Good Morning, Stampers!


Here is the inspiration for today's project.
I came across these adorable wall hangings while 
searching Pinterest recently. I thought they would be cute 
as ornaments so I went on a mission to see what I could
find to make a smaller version.


Dollartree Wooden Dominoes for the win! These are the perfect
size - measuring approximately 1 1/2" x 2 3/4" and there
are (28) in a package for just $1.00! Such a deal!
Look for them in the toy section.


I started by adding holes at the top for hanging.
The wood is really soft so using an awl with a
little pressure was enough to get it thru - no drilling needed!


The Snowfront Stamp set makes the sweetest
winter scenes - so peaceful and serene, don't you think?

Here is how I completed these ornaments:

1. Add the woodgrain designer paper from the In Good Taste collection directly 
on top of the dominoes using Tombo Multi-purpose liquid glue.
2. Rub the edges of the domino with Early Espresso ink.
3. Add wire for the handles.
4.. Stamp the sentiment onto the domino using Jet Black Stazon ink.
5.. Stamp the scenes onto the die cut shapes using Early Epsresso, Old Olive and Pool Party inks.
6. Adhere the shapes to the dominoes using Stampin' Dimensionals.
7. Add bows using glue dots.


SU!pplies:
Stamps: Snow Front, Itty Bitty Christmas
Ink: Early Espresso, Pool Party, Old Olive
Paper: Whispser White, Real Red, In Good Taste DSP
Accessories: Stitched Stars dies, Be Mine Stitched dies, Wire for hanging, Real Red Ribbon, Whisper White Baker's Twine.


Happie Stampin'!
~Melissa
Find and share ideas on our Facebook Page!


Monday, October 19, 2020

Poinsettia Petals Holiday Card Kit Bonus Gift

 Good Morning, Stampers!

The October Holiday Card Kit to Go is going postal today! Watch your mailbox for your kits! I've included this bonus idea featuring pieces of your kit contents - a simple and elegant ornament/tag Keep it for yourself or give as a gift - your choice!  THANK YOU again for participating in this month's kit. Details on the November kit will be coming soon so stay tuned!

Happie Stampin'!

Monday, December 16, 2019

Makeover Monday - Glitter Ornaments

Good Morning, Stampers!


If you've been to your Dollar Tree during the holidays, chances are
 you 've seen these packaged ornaments. They come in lots
of shapes and sizes as well as different finishes. They 
are so pretty by themselves, but look even better 
when you stamp them up a bit!


The Christmastime is Here suite is accented
with shimmery gold, so these dove ormanents 
complement the products nicely.


Adding the Hand Lettered Prose alphabet dies
cut with Gold Glimmer paper makes it easier
than ever to personalize your ornament, too!

SU!pplies:
Stamps: Christmastime is Here
Ink: Versamark
Paper: Very Vanilla, Gold Glimmer
Accessories: Heat tool, Gold embossing powder, embossing buddy, Hand-Lettered Prose dies,, Cherry Cobbler Stampin' Blends, Mossy Meadow Stampin' Blends, Champagne Shimmer Paint,
Aqua Painter

Happie Stampin'!
~Melissa

Monday, December 02, 2019

Makeover Monday - Little Wooden Ornaments

Good Morning, Stampers!

It's another Make Over Monday with dollar store items! Today, I have used this stacking block game to create ornaments/gift tags. Just add eye screw-in hooks from your local hardware store along one side for hanging and decorate!

Tumble Tower...


There are so any ways to decorate these! Add 
a little touch - they're so much fun!
Happie Stampin'!
~Melissa

Friday, November 29, 2019

Natural Wood Ornaments

Good Morning, Stampers!

Handmade ornaments are another way for us to channel our inner crafter I created these (2) different
ornaments featuring Tuxedo Black ink and various colors of Stampin' Blends stamps and ribbons - they are so easy!. Make these for your tree or use the ideas as tags for your gift bags!


1. Grab some 3" wooden rounds from your local craft vendor or online at 
1.  Stamp the image(s) onto a  3" wooden circle using Tuxedo Black ink.
2. Color the image(s) using Various colors of Stampin' Blends.
3. Add ribbon toppers and they are ready for hanging!

Happie Stampin'!
~Melissa

Friday, December 21, 2018

Last-Minute Holiday Idea

Good Morning, Stampers!

Looking for a last-minute holiday idea? I created this wreath using a canning jar lid and the Sprig punch. Just punch several sprigs and adhere around the outer edge of the lid using Multi-purpose liquid glue and let dry. Then, add a couple of pine cones, a sentiment, bow and red rhinestones to finish it off. Makes a great gift tag or ornament for the tree!

SU!pplies:
Stamps: Paper Pumpkin November 2018
Ink: Real Red
Paper: Whisper White, Early Espresso, Shaded Spruce
Accessories: Red rhinestones, Silver/White Baker's Twine, Canning jar lid, Sprig punch, Pretty Pines thinlits

Happie Stampin!
~Melissa

Thursday, November 29, 2018

A Paper Pumpkn Thing December Blog Hop - To You and Yours

Good Morning, Stampers!


You are going to LOVE this month's kit To You and Yours
just the way it is, but you will be inspired to create
alternate projects on this month's blog hop! 


I went #simplestamping with my kit!
I created ornaments/tags as well as a 
quick and easy card!


Here, I used the backside of the green sprigs to
create an all-white scene with a little touch of Cherry Cobbler.


This one, I added the sentiment cut from the 
plaid paper using the Merry Christmas thinlits 
and a few rhinestones colored with my Cherry Cobbler blends.


and this one, I created a mistletoe! 


A #simplestamping quick and easy card
with a few of the Cherry Cobbler colored rhinestones.

Happie Stampin'!
~Melissa

Ready to see the rest of the hop? Follow along below:

Monday, November 12, 2018

Holiday Deer Tin Ornament

Good Morning, Stampers!

Looking for something a little different for a gift this holiday? Check out this ornament I created featuring a plain store bought tree-shaped tin ornament. I brought a dozen of these to Onstage this past week to give to both new and old friends! I love the deer in glimmer paper - it just dazzles on the tree filled with lights!


To create this ornament:
1. Die cut a deer from the Rose Glimmer paper
2. Stamp the sentiment onto Whisper White cardstock using Versamark ink.
3. Sprinkle the sentiment using Silver embossing powder and heat set.
4. Punch the sentiment using the Classic Label punch
5. Cut a  1 1/2" x 12" piece of Whisper White cardstock.
6. Score every 1/4" all the way across.
7. Montain/valley fold the strip and adhere the two ends together.
8. Press the piece together to form the medallion and secure with hot glue in the center.
9. Adhere the medallion to the Peralized Doily with hot glue.
10. Adhere the medallion to the tin using hot glue.
11. Adhere the deer to the medallion using Stampin' Dimensionals.
12. Adhere the sentiment to the deer using Stampin' Dimensionals.
13. Hang on your tree!!


SU!pplies Needed to Complete:
Stamps: Itty Bitty Greetings
Ink: Versamark
Paper: Rose Glimmer, Whisper White
Accessories: Store bought tin ornament, Peralized medallion, Stampin' Score Scoreboard, Silver/Whisper White Bakers Twine, Deer framelits, Hot glue, Silver embossing powder, heat tool

Happie Stampin!
~Melissa

Thursday, November 01, 2018

OSAT Blog Hop Silver Bells and Sea Shells

Good Morning, Stampers!
Welcome to our Silver Bells and Sea Shells
October Blog Hop! The holidays are fast approaching!
The designers are here to share some projects
to help inspired you!


How about gold bells?? The little bells from the Mistletoe
Season stamp set was just the right size for this wreath card.
I created the card at 5 1/2" x 5 1/2" from Whisper White cardstock.
 Then, I added a penciled circle in the center and added the sprigs using 
Old Olive, Shaded Spruce and Gold Glimmer papers. The little bells were 
stamped onto Gold Foil paper and embossed with gold embossing powder. 
It is hung from behind the Cherry Cobbler bow with gold thread.


The matching wreath ornament/tag was created without the bells
but they could easily be added. I used  (2) Layering Circle framelits
 together to create the base from Whisper White cardstock.
**Note: you can add a few bases together for stability.
SU!pplies:
Stamps: Mistletoe Season
Ink: Cherry Cobbler, Versamark
Paper: Whisper White, Shaded Spruce, Cherry Cobbler, Old Olive, Gold Foil, Gold Glimmer
Accessories: Sprig Punch, Layering Circle Framelits, Embossing Buddy, Gold Embossing powder, Heat Tool, 1/2" circle punch, Gold Thread

Happie Stampin'!
~Melissa

Ready for more? The designers are excited to share their projects with you - take a look!


Wednesday, November 29, 2017

Be Merry Ornaments

Good Morning, Stampers!

These adorable ornaments are from the Be Merry kit in the Holiday Mini Catalog. I've assembled them and giving one away FREE with every $35 (before tax/shipping) order you place in my online store while supplies last! Use them as an ornament for the tree or add it to a package for a festive gift tag! (Each finished ornament measures 4")


Be sure to add the December Hostess Code
to your order and I will mail your
gift with your order confirmation.

Happie Stampin'!
~Melissa

Friday, November 24, 2017

Merry Wishes Reindeer Ornament

Good Morning, Stampers!

I came across these corrugated reindeer ornaments while shopping and knew they could be so much more with a little Stampin' Up! magic added! A red rhinestone nose, Pretty Pines thinlits embellishments and a cheery sentiment help bring this little guy to life! I had several of these on hand for my recent trip to the Onstage Stampin' Up! convention for some of my favorite stampin' friends!

SU!pplies:
Stamps: Oh, What Fun
Ink: Cherry Cobbler
Paper: Whisper White, Garden Green, Crumb Cake, Early Espresso
Accessories: Basic Rhinestones, Pretty Pines thinlits, Real Red Tinsel Trim, Red Dazzling Details (retired)
Non-SUpplies: Red permanent marker, Corrugated Reindeer ornaments (Walmart)

Happie Stampin'!
~Melissa

Sunday, September 03, 2017

Be Merry Kit by Stampin' Up!

Good Morning, Stampers!

This is a fabulous new kit in the Holiday Mini Catalog. Create your own holiday ornaments or gift tags using this easy to assemble Be Merry Kit! Follow along with the simple instructions or go off on your own and create your one-of-a-kind design!


Kit includes:
* 12 ready-to-assemble rosettes, 6 each of 2 designs, finished size: 4" diameter 
* Old Olive and Real Red die-cut accents
* Gold foil doilies and accents
* White die-cut circles
* Green and red glimmer paper die-cuts
* Precut Real Red 1/4" (6.4 mm) Cotton Ribbon 
* Precut Old Olive 1/4" (6.4 mm) Cotton Ribbon
* Green and red shimmery tulle circles
* Wood banners

Coordinating colors: Gold foil, Old Olive, Real Red, white

$19.00 (+ shipping and tax)

Be sure to use the Hostess Code to receive a FREE GIFT
from me when your order reaches $35 or more
before tax and shipping. 
(FREE GIFTS are mailed out at the end of the month)

Happie Stampin'!
~Melissa